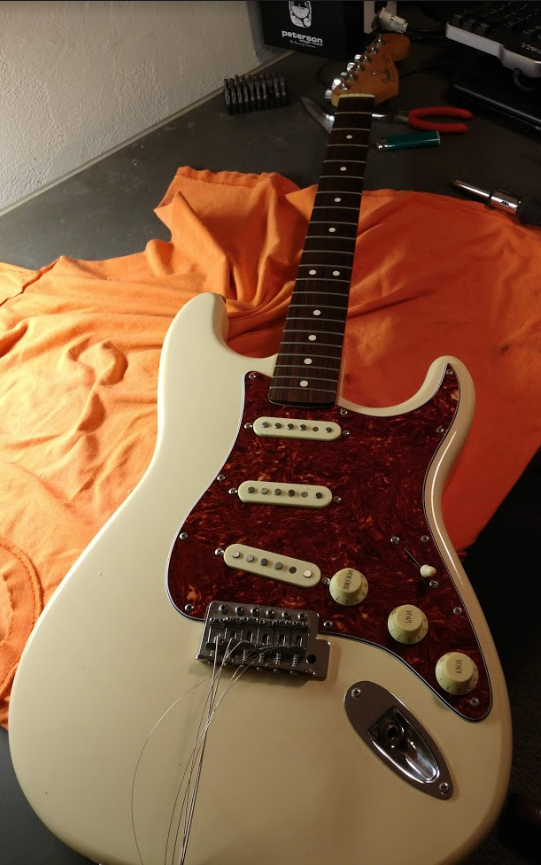
96' Strat......givin` it some love...
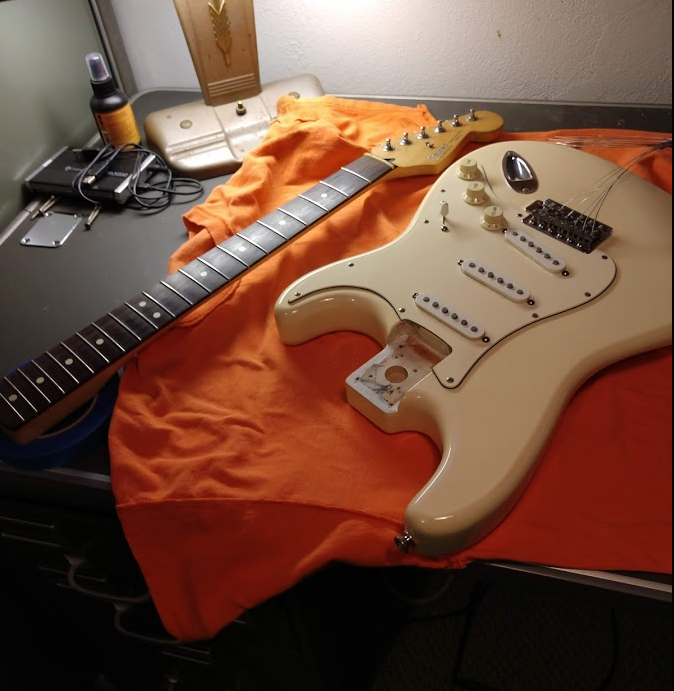
I've had this guitar for years...and never really bonded with it. It has a few things wrong with it.....so I decided to dive in and see if it could be salvaged, and made into a decent playing guitar. If not.....it might be time for a trade in.
(Or a match.....)
With the new Squiers playing so well and being so cheap.......no reason to keep a bad playing strat around.
(Or a match.....)
With the new Squiers playing so well and being so cheap.......no reason to keep a bad playing strat around.
I can't remember how long I've had this guitar, but I know it's been hanging around for at least 7-8 years....just one of those projects that I never quite got to....I also can't remember how much I paid for it...which means it wasn't much. But...I have a hard case for it .?? (weird)
--edit: Never mind ...hard shell case was for a tele....this only came with a gig bag...
The worst problems are all with the neck. Sharp frets / fret ends, bad action, rattling tuners, old style string tree, and a poorly cut nut on the high E (to close to the edge of the fretboard.)
Yea...neck has issues. Can't believe I actually bought this thing.....WTF was I thinking...
But...these issues are all fixable for very little $$$.
I also never really dug the white on white body/pickguard combination.... so I figured if I'm tearing into it....might as well do something about that as well.
Stamped 1996.....not exactly one of Fenders "best years" for the Made In Mexico Strats
I started off with some pretty high hopes....I figured that if I could at least get the neck straight and get the fret ends smoothed out, the playability would go up dramatically, and that the other issues could be dealt with fairly easily.
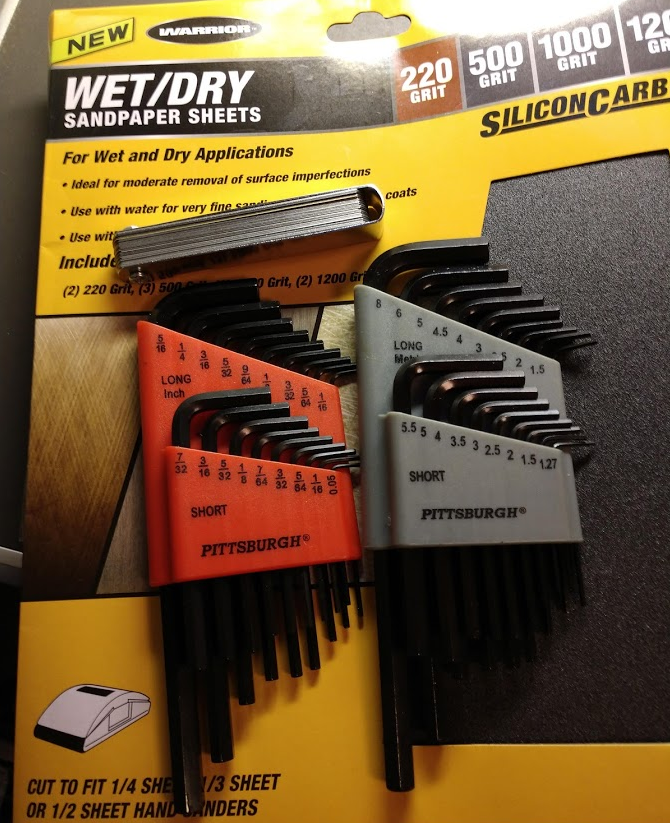
So...a quick trip to the auto parts store to get some supplies.
The truss rod wrench vanished years ago, and I couldn't find the correct size in my pile of wrenches...so I picked up a full set of metric and standard for less that $8.00, a pack of sandpaper, and a feeler gauge set.
Total came to $17.00 and some change.....
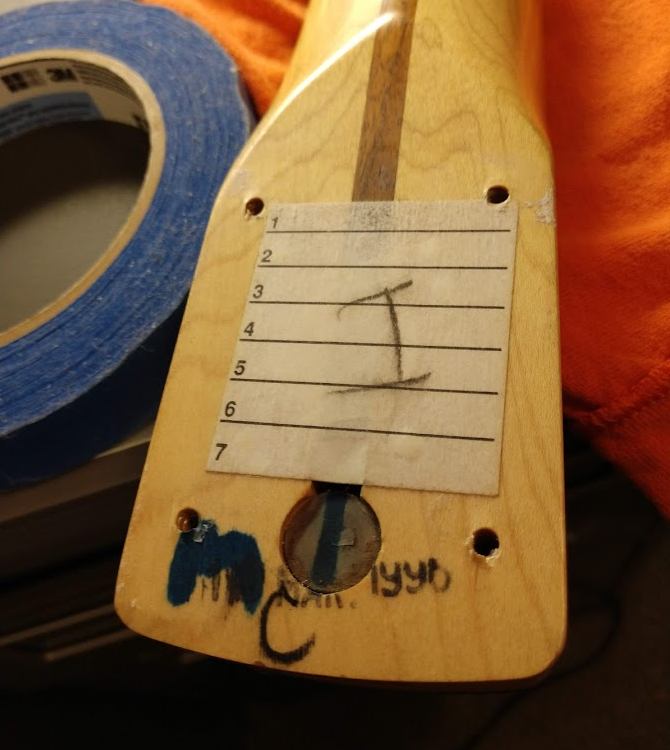
First thing I did was pop the neck off......that is where most of the issues are at ...so that's where I started.
The neck didn't *look* to bad...no major visible issues. Didn't look like any twists or any crazy stuff going on..
I don't have a "proper" neck straight edge/ notched ruler so I had to use a plain old 24" level, and just lay it across the frets (and hope all the frets are relatively the same height).
Using the level...it was pretty obvious that the neck had a slight up-bow (maybe slightly more than "slight" ).... good thing I bought those wrench sets.....

I kind of thought ahead on the sharp frets....and ordered a FretGuru fret file....never used one before, so this could/should be a learning experience...or it's going to be an unrecoverable disaster.....
*Seems* like cleaning up some fret ends and smoothing out some corners *should* be a fairly easy process... I think the key here is to go slow..you can always file more material off...but putting it back on is a bitch. This is one of those instances, where having to do a job twice is a lot better than screwing it up once.
Since I had the guitar open.....I took a few more pics...just for the curious / guitar geeks.
Gotta say....not really impressed......looks like the painting started while there was still sawdust in the neck pocket and routes....
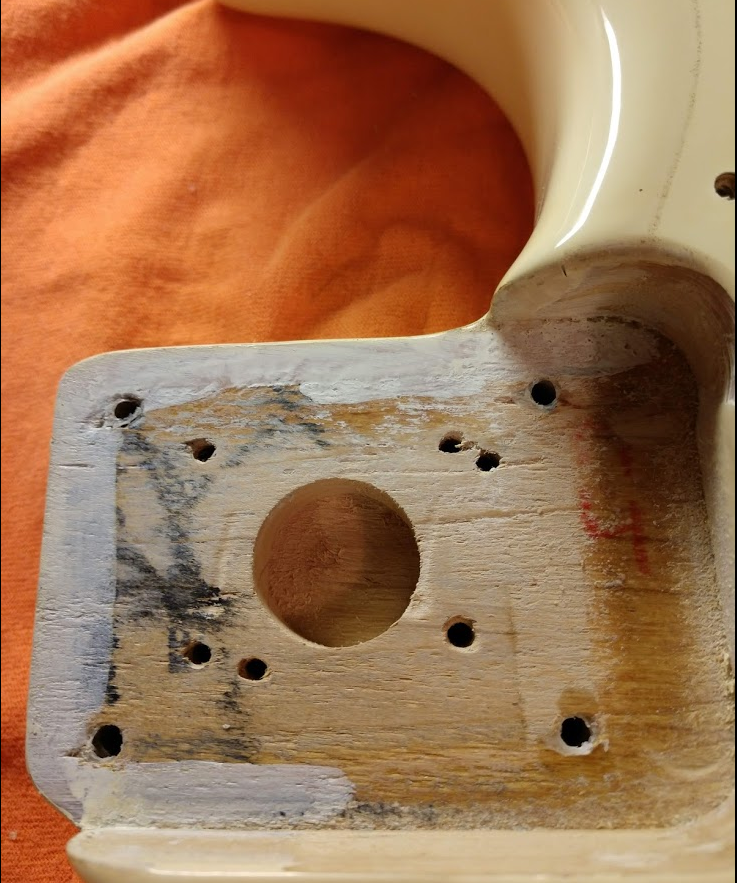
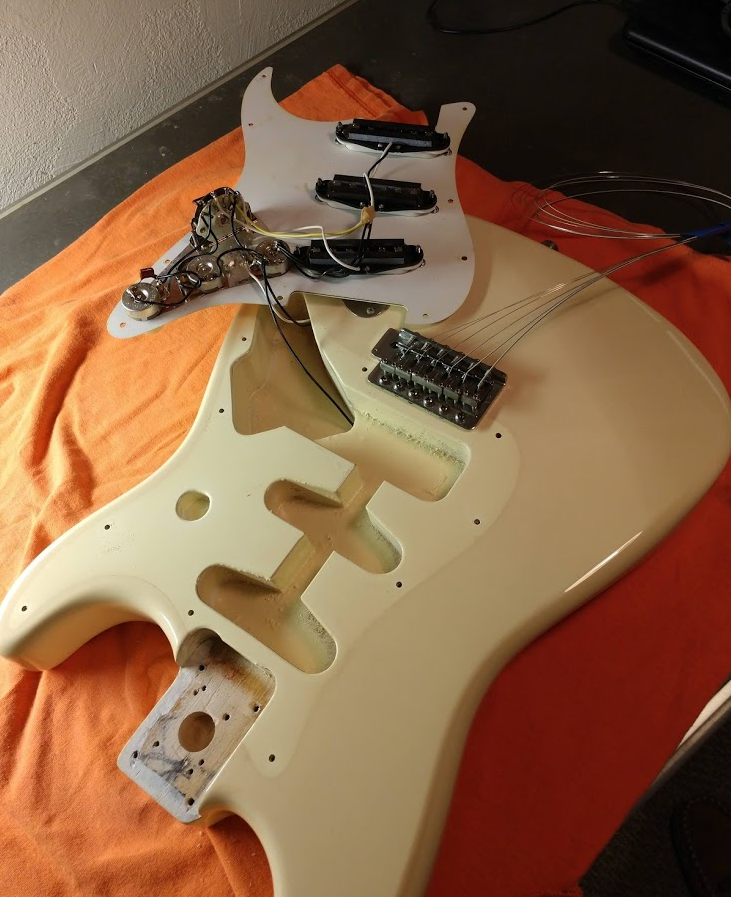
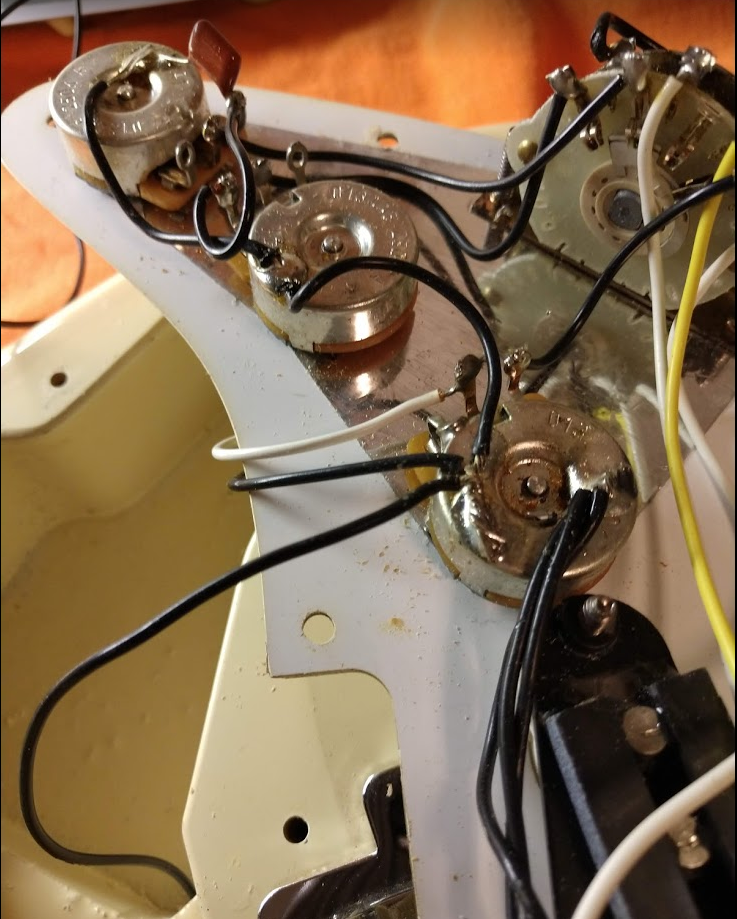
Looks like my neck pocket was used as a cribbage board....the next couple are just a gut shot, and a shot of the tan line....and lastly a pic of the electronics. Surprisingly, the electronics are done pretty well...fairly neat and tidy and the wires are actually wrapped and secured to the posts (and each other), rather then just stuck in a blob of solder (but almost no shielding on the underside of the pickguard.......).
Truss rod was a little tight at first , but after it was broken loose and messed with a little, it seemed to work very smoothly....tightened and loosened just like it's supposed to. For the time being, I set the truss rod nut very loose, and just let the neck sit and relax. Let it get to it's natural resting point, then I'll deal with it.
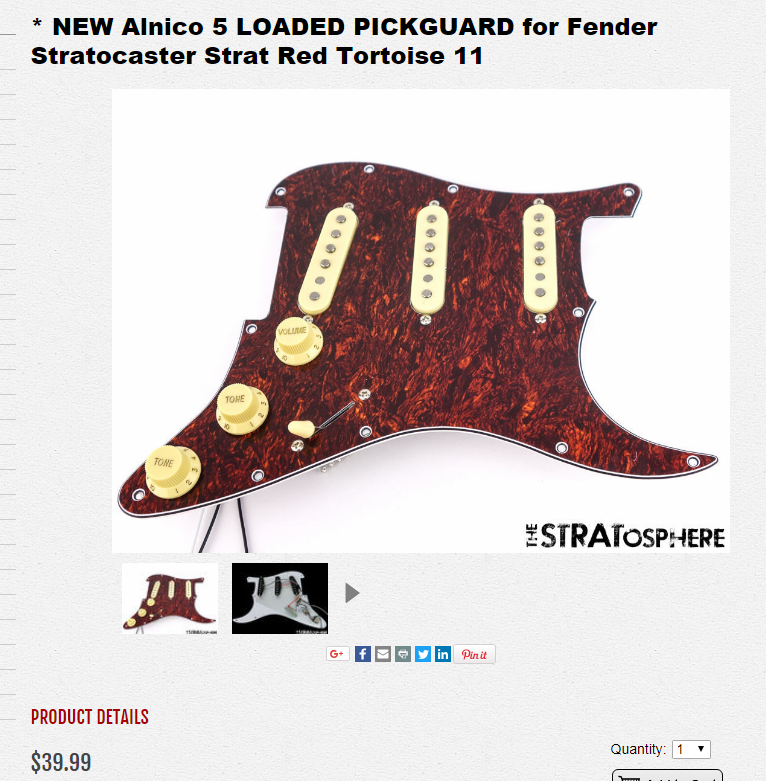
I decided on replacing the white pickguard with something a bit more stylish.....but still cheap.....here is what I decided on.
I think after shipping etc...it came to just about $50.00. I thought it was a decent deal.... I set my expectations a little low...I didn't figure it would be great quality stuff. Even if the electronics all suck, I should be able to at least part out some of it. If the pickups really stink...I can always put the originals back in.
I think after shipping etc...it came to just about $50.00. I thought it was a decent deal.... I set my expectations a little low...I didn't figure it would be great quality stuff. Even if the electronics all suck, I should be able to at least part out some of it. If the pickups really stink...I can always put the originals back in.
I don't think it looks to bad ?? Kinda digging that look !
The new guard came prewired and only required 3 solder joints....it (literally) took about 10 min. to swap it out....and most of that was waiting for the soldering iron to heat up...
I plugged it in just to verify that the pickups were all working as expected...they were...but..it also reminded me how freekin' noisy this guitar is. I have a couple other single coil guitars, so I'm used to a little noise....but this thing is exceptionally noisy. I was hoping that changing out the electronics (including the pickups) might cure a lot of the noise. The new pickguard also had significantly more shielding on it then the old one...so you'd think it would be a little quieter ......no such luck. My best guess is that I have some sort of grounding issue.
Since everything else has been replaced....I'm wondering about a new output jack.
I took the jack apart...and the solder joints all look good....wonder if maybe the grounding on the actual jack is pooched. Dirt and corrosion can mess an output jack up pretty badly. It was also a little loose...so I gave it a little twist to snug it back up.
I bet I could get a switchcraft jack and a Trem arm pretty cheap....hopefully from the same spot (to save on some shipping). The original trem arm went MIA years ago....no clue where it's at....might as well order one....
a quick jump on Amazon...and....
---Switchcraft 11 Guitar Input Mono Phone Panel Jack
---Canomo Guitar Luthier Tool Set Includes 1 Piece Guitar Fret Crowning Luthier File, 1 Piece Stainless Steel Fret Rocker Leveling Tool, 2 Pieces Fingerboard Guards with 2 Sheets Sanding Paper
---5mm Thread Tremolo Arm Whammy Bar for Fender MIM Strat
total : $29.17
(After looking at the frets a little bit.....I *think*a couple more tools may be needed....thus the tool kit..)
Need to keep an eye on the cost .... I don't mind buying tools, since they can almost always be reused, but the nickel and dime stuff could get out of control pretty easily. Don't really want to put a whole lot of $$$$ into this thing (it ain't worth much...). Probably already up to $60-$65, just in parts, and ...I still need a new nut.
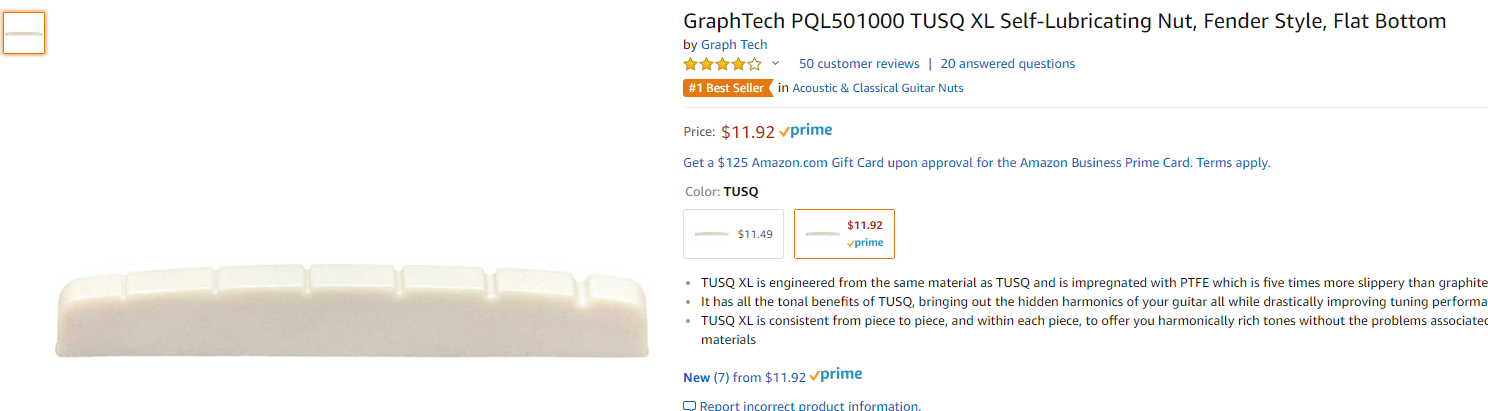
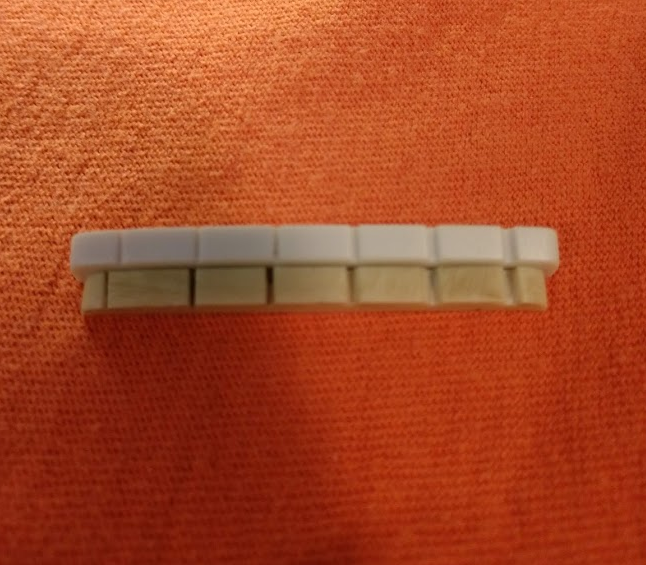
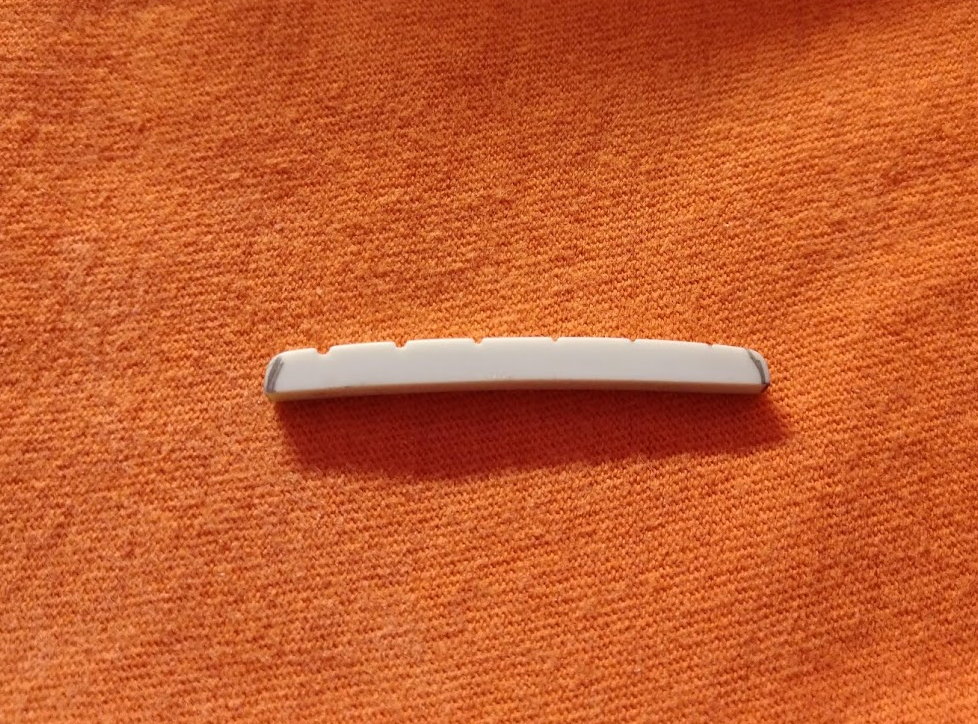
After some poking around.....I *think* this is the correct nut....not 100% sure...but after looking at some of the pics provided in the reviews....I *think* my neck has the flat bottom nut. I went with a pre cut one.....just so I didn't have to buy any saws / files.
Why a new nut ??
This is why.....
Why a new nut ??
This is why.....
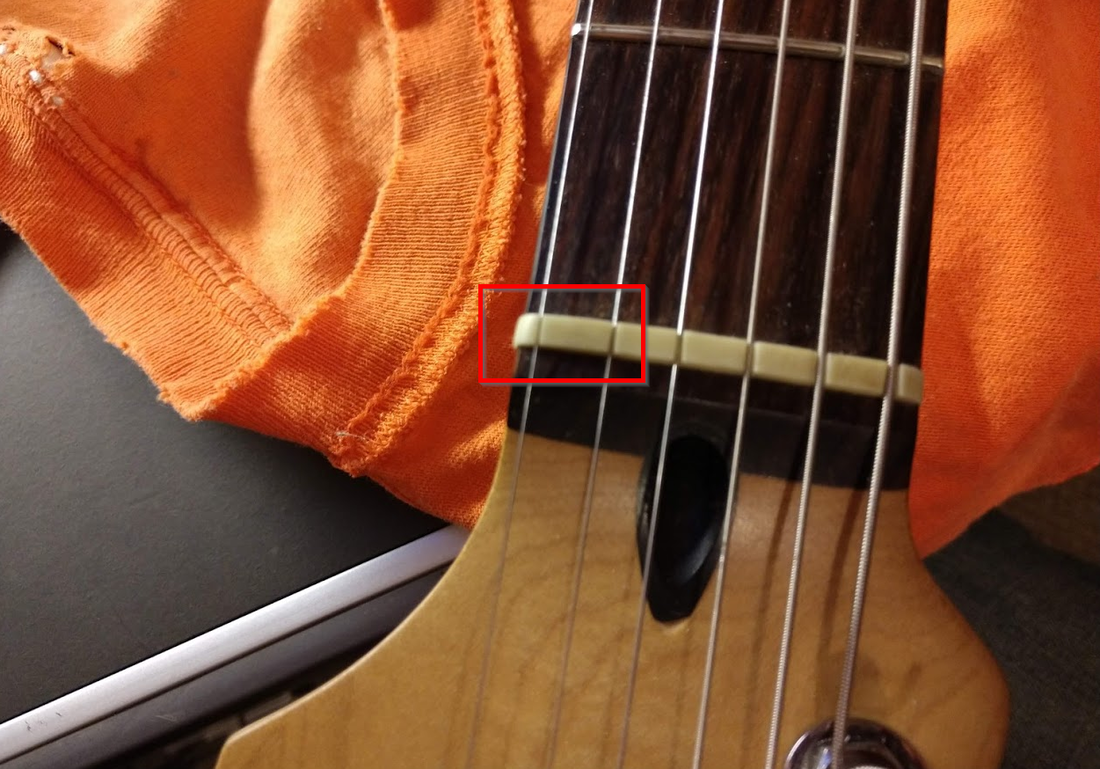
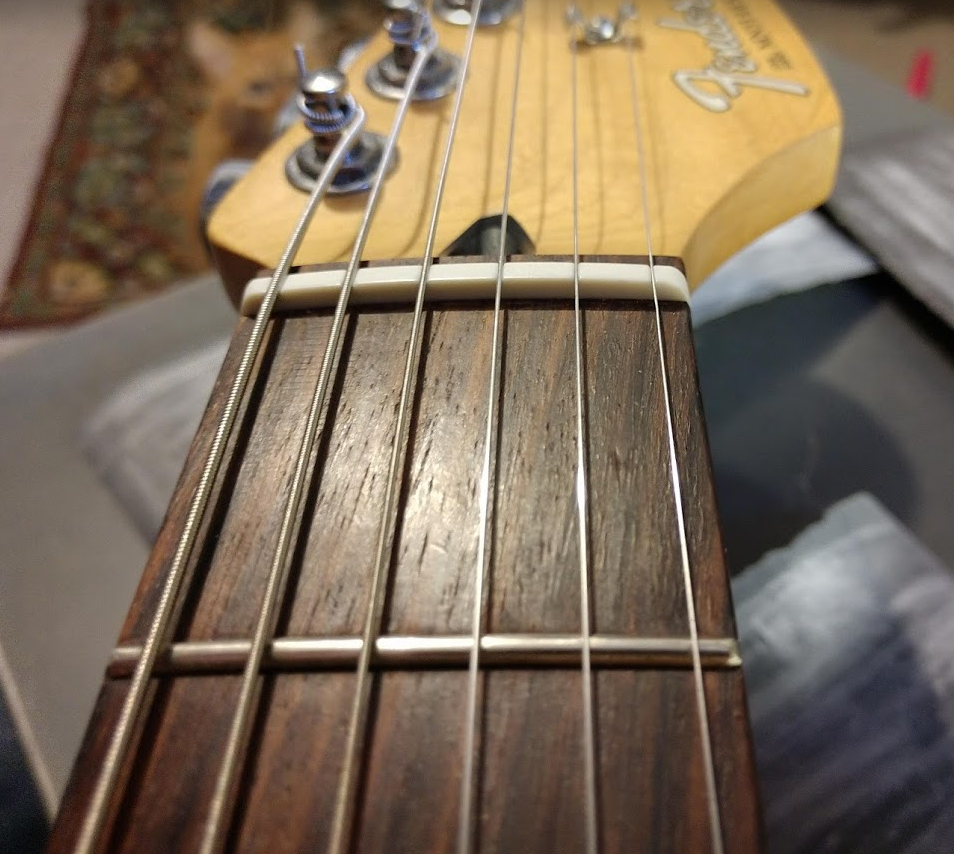
The spacing on this nut is not right......and this causes the high E to be to close to the edge of the fretboard. If you look close...you can see the nut also hangs over the edge of the fretboard. The high E needs to be just about the width of itself closer to the B string. Plus....all the notches seem little deep.
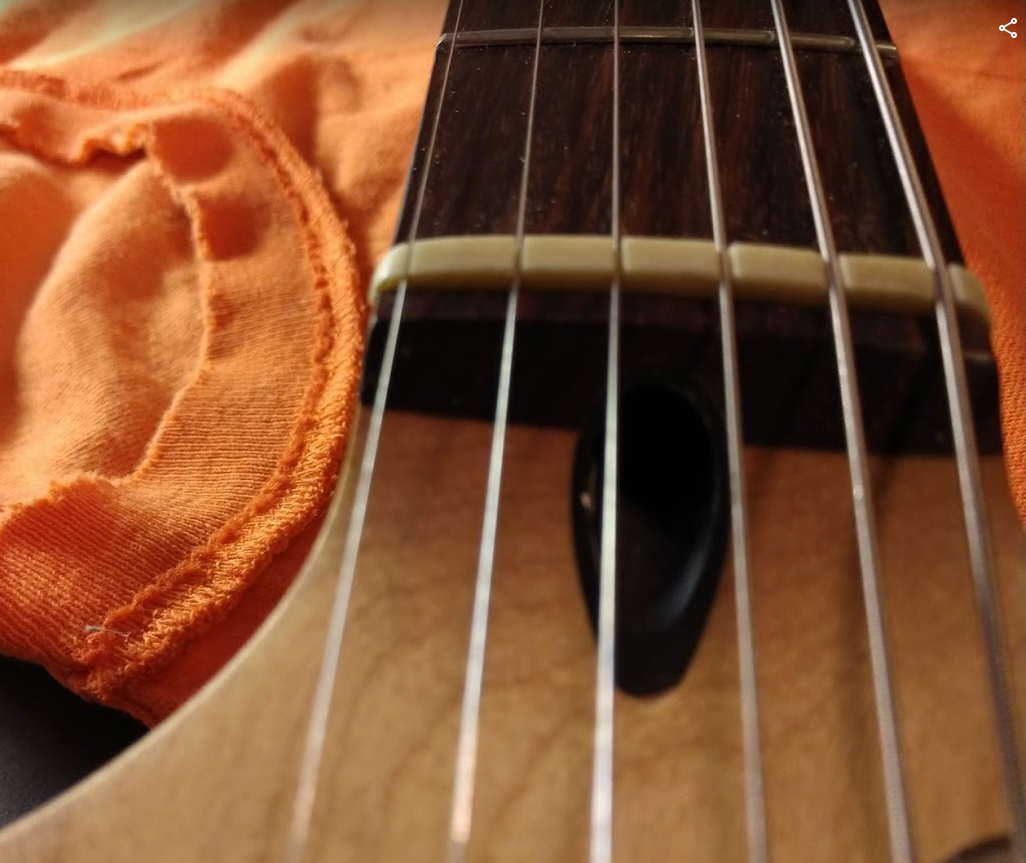
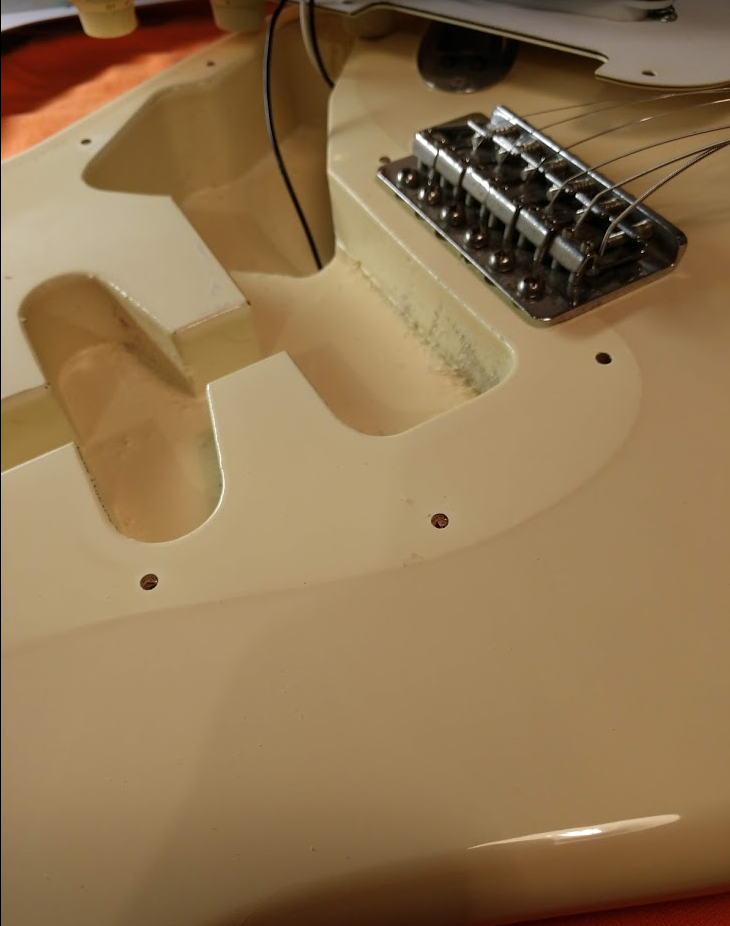
The High E being off a little at the nut has repercussions at the other end of the guitar....
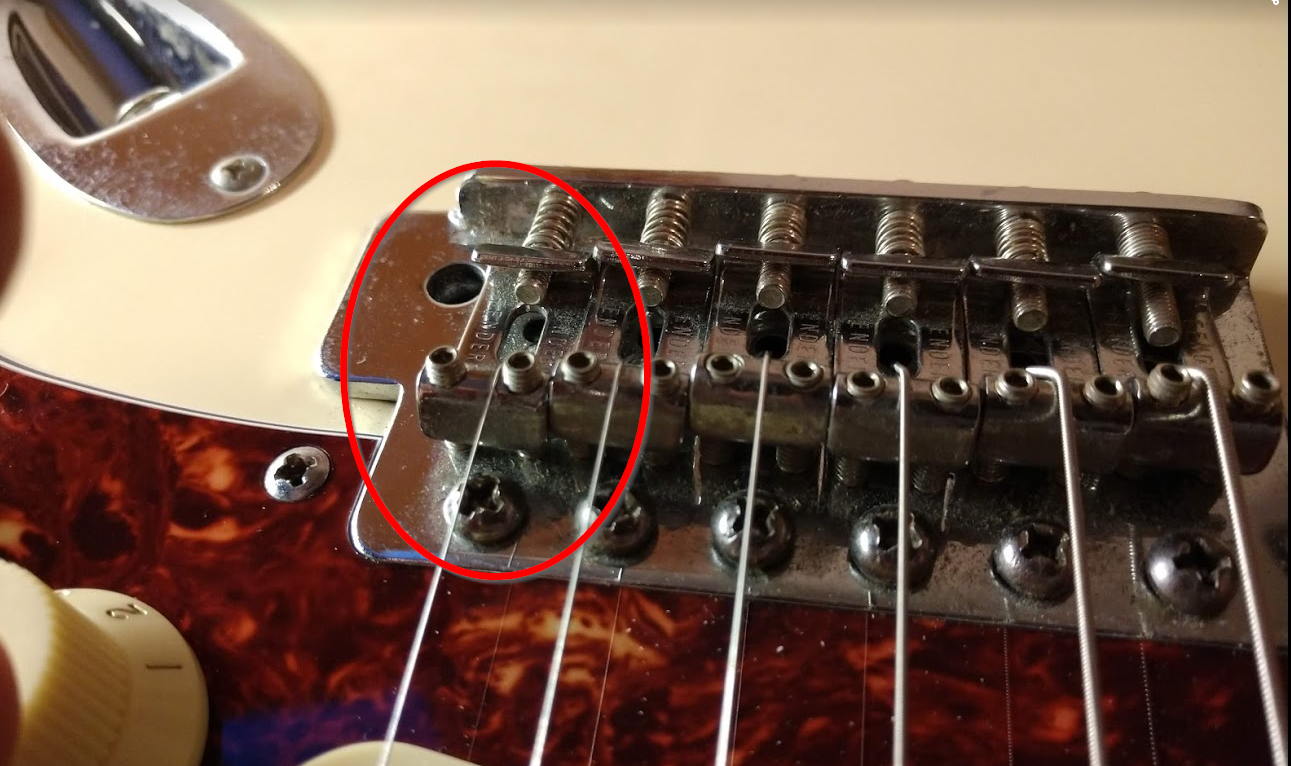
It's not supposed to be that way......middle of the saddle is where the string is supposed to sit. But to compensate for the poorly cut nut, the string has to be jacked off to one side to make it usable. I think this causes all of the bridge saddles to be a little off kilter....
While waiting for the nut and jack to get delivered..... .... I did a little work on the neck.
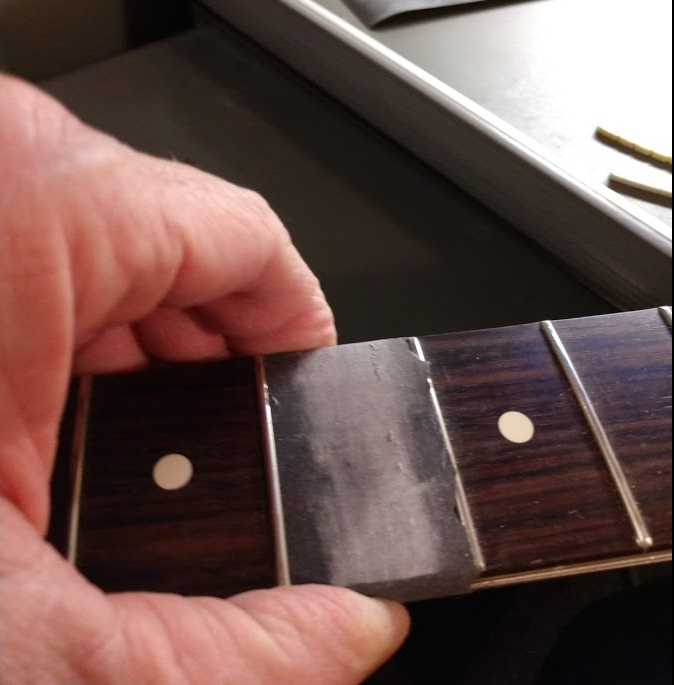
The first issue I needed to deal with was some sharp fret ends. The fret ends have always been a bad on this guitar, but , I think time has dried out the fretboard even more, and the sharp frets have really become noticeable.
Since I don't have the specific tool as shown here:
(Daves World of Fun Stuff.... Sharp Fret End Friday)
https://www.youtube.com/watch?v=ISLRjvNuyGU
(at about the 6:00 min. mark he is using the "correct" tool ??)
I had to improvise.
The process I used is pretty well outlined here:
https://ayersguitarco.wordpress.com/2014/01/21/sharp-fret-ends/
I simply used the flat edge of my level, wrapped some sand paper (tightly as possible) over it, and SLOWLY sanded the edge of the frets.....in long straight movements up and down the entire neck, keeping as perpendicular to the fretboard as possible.
While waiting for the nut and jack to get delivered..... .... I did a little work on the neck.
The first issue I needed to deal with was some sharp fret ends. The fret ends have always been a bad on this guitar, but , I think time has dried out the fretboard even more, and the sharp frets have really become noticeable.
Since I don't have the specific tool as shown here:
(Daves World of Fun Stuff.... Sharp Fret End Friday)
https://www.youtube.com/watch?v=ISLRjvNuyGU
(at about the 6:00 min. mark he is using the "correct" tool ??)
I had to improvise.
The process I used is pretty well outlined here:
https://ayersguitarco.wordpress.com/2014/01/21/sharp-fret-ends/
I simply used the flat edge of my level, wrapped some sand paper (tightly as possible) over it, and SLOWLY sanded the edge of the frets.....in long straight movements up and down the entire neck, keeping as perpendicular to the fretboard as possible.
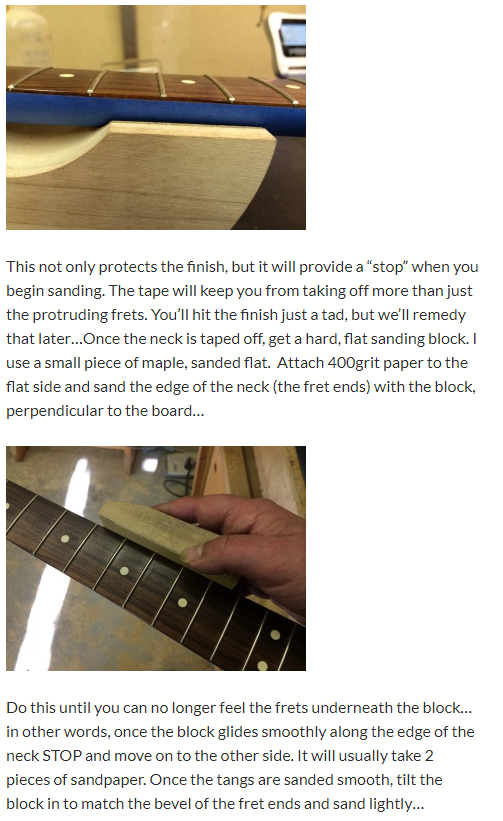
I took it VERY slow....and was careful not to remove to much material....when I reached the point where I was thinking " This is going good...I'm crankin' at this....almost there...a few more passes and it will be great!"... I stopped.
Like I said...I'd rather do this job twice than pooch it once....
Once I was done with the protruding fret ends.... I moved on to using the FretGuru fret file.
the technique is shown here:
https://www.youtube.com/watch?v=-Hti5s8LP9A
(at about 1:50)
There is definitely a learning curve, and an acquired technique for this.... it was pretty awkward at first....so I went very slow (as usual)....only made like one or two *light* passes on each fret. This is one of the things that I can see going badly in a hurry if you are pressing to hard, or are trying to rush the process and/or force the file...I think slow and steady wins this race....and doesn't mess up any frets. So...each fret ...one at a time....both sides, and both sides of the neck.....
After messing with the frets for an afternoon....I decided it might be time to stop, put everything back together, and see how it plays. See if any of this work has made any improvement in how it plays......after all...that's kinda what it's all about.
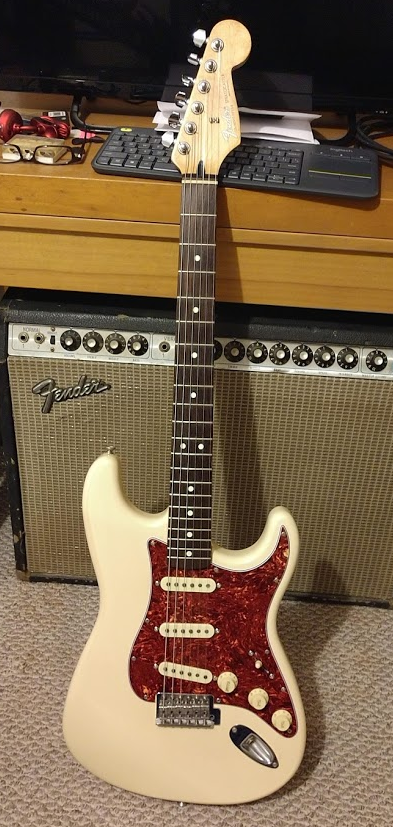
All back together....'gotta say ....I'm really liking that tort pickguard...it matches up with the aged white really nicely.
"Oh my my, oh hell yes" (--TP)
Ok...yep....just that little bit of awkward, clumsy, ghetto, untrained, seat-of-the-pants work on the frets made a NOTICEABLE difference. The neck feels significantly better when sliding my hand up / down the fretboard. I can still feel some fret ends sticking out, so it needs another round of sanding etc...but I'm definitely on the right track here.
Ok...yep....just that little bit of awkward, clumsy, ghetto, untrained, seat-of-the-pants work on the frets made a NOTICEABLE difference. The neck feels significantly better when sliding my hand up / down the fretboard. I can still feel some fret ends sticking out, so it needs another round of sanding etc...but I'm definitely on the right track here.
The Nut job
Received my new nut........so lets get to it......
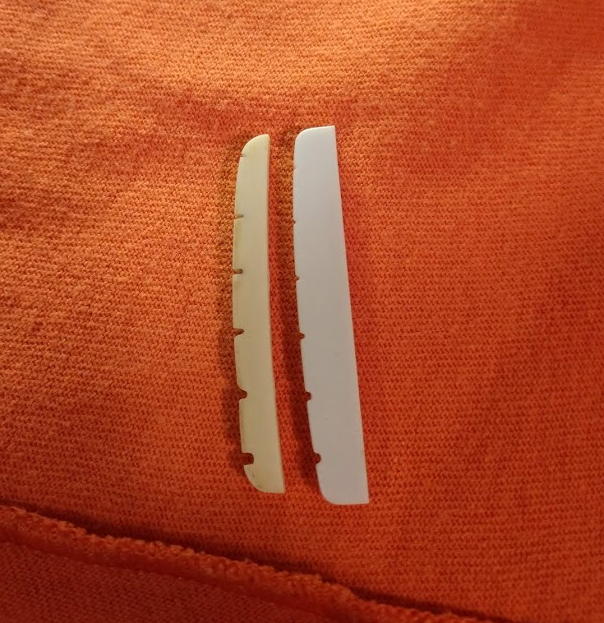
Good news.... old nut popped right out....managed to get a fingernail under the slight overhang on the high E side... gave it a little push...and it came out clean as a whistle.
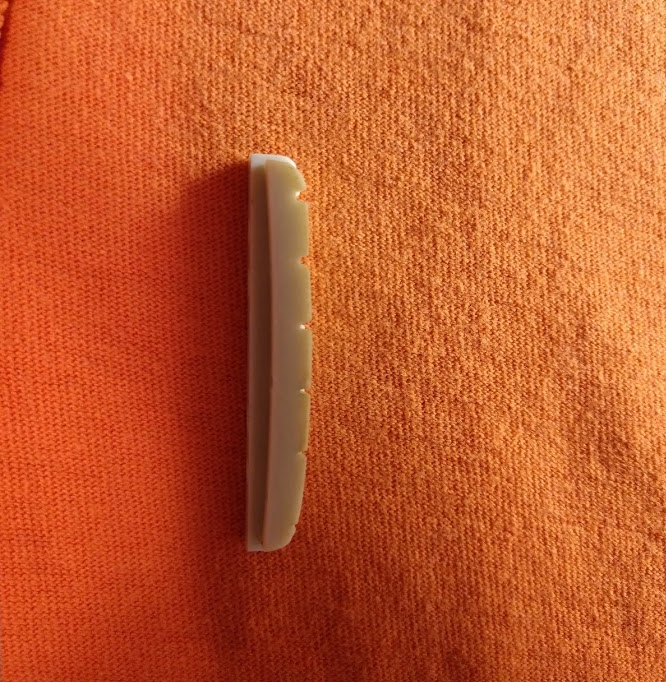
Bad news.....the bottom ain't flat....
Received my new nut........so lets get to it......
Good news.... old nut popped right out....managed to get a fingernail under the slight overhang on the high E side... gave it a little push...and it came out clean as a whistle.
Bad news.....the bottom ain't flat....
well.... shit....
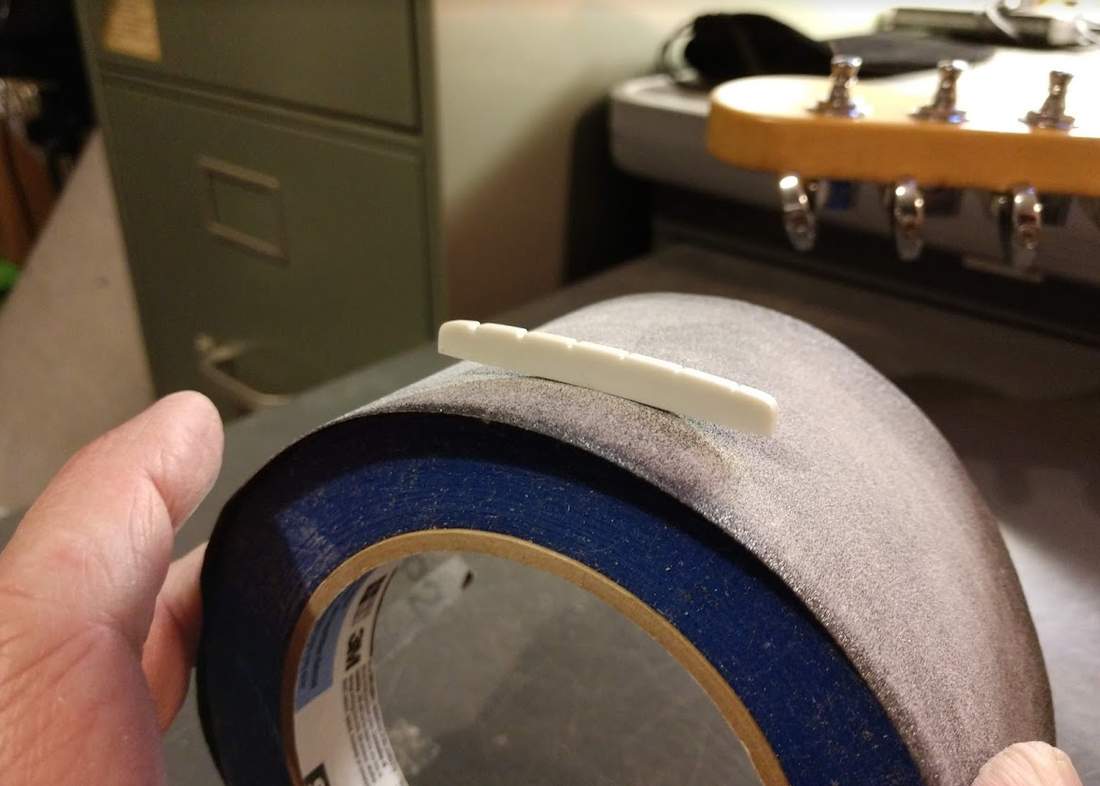
...you can see how much the high E cut is off when you compare the two...
So...a-sanding-we-shall-go. 250, 500, and 1000 grit sandpaper....and some painters tape.
Here are some pics of the process....
Here are some pics of the process....

Top left to bottom right ...like you read a book...
1. Starting...old nut on top of new nut. The new nut was almost the exact correct width, it only took a very short time sanding the flat side of the nut on a flat surface to get it correct, so it fit in the slot firmly, but not like, hammer-in tight...
2. By using the roll of tape as a curve guide...and placing some 250 grit sandpaper on it...I was able to sand both back and forth (with the curve of the roll of tape) , and left / right (perpendicular to the curve...).
3. I quickly removed a lot of material, and got a rough shape.
4. For the fine sanding I switched to the 500 and 1000 grit placed across the guitars fretboard. Again, I went both with the grain and across the grain (of the fretboard) to march the radius of the fretboard as closely as I could.
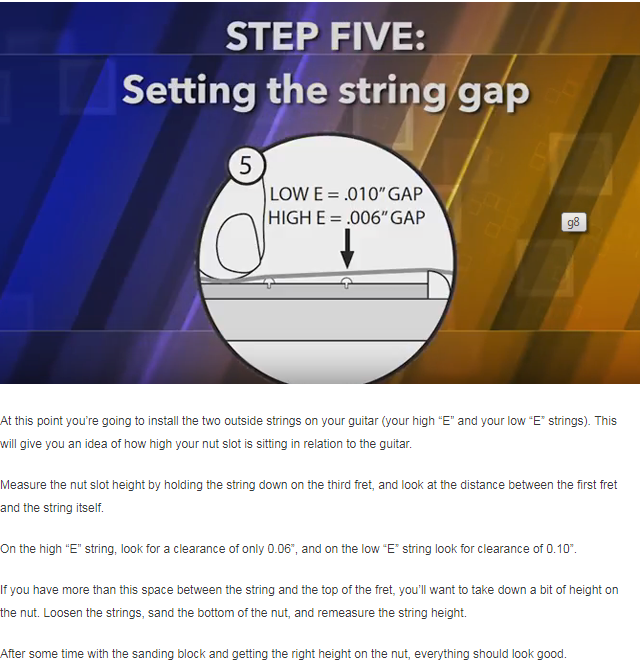
5. Test fitting, to get the height of the low E correct. The low E height was what I aimed for, I figured I'd have to do some adjusting for the high E side....and I was right. Below is a pic of what I used for my string gap (from the GraphTech workshop site). After I got the low E set...I sanded off the high E side of the nut until I got it good as well. Again...I used the guitar fretboard as my radius gage and focused on sanding down the High E side of the nut bottom, and keeping the radius.
1. Starting...old nut on top of new nut. The new nut was almost the exact correct width, it only took a very short time sanding the flat side of the nut on a flat surface to get it correct, so it fit in the slot firmly, but not like, hammer-in tight...
2. By using the roll of tape as a curve guide...and placing some 250 grit sandpaper on it...I was able to sand both back and forth (with the curve of the roll of tape) , and left / right (perpendicular to the curve...).
3. I quickly removed a lot of material, and got a rough shape.
4. For the fine sanding I switched to the 500 and 1000 grit placed across the guitars fretboard. Again, I went both with the grain and across the grain (of the fretboard) to march the radius of the fretboard as closely as I could.
5. Test fitting, to get the height of the low E correct. The low E height was what I aimed for, I figured I'd have to do some adjusting for the high E side....and I was right. Below is a pic of what I used for my string gap (from the GraphTech workshop site). After I got the low E set...I sanded off the high E side of the nut until I got it good as well. Again...I used the guitar fretboard as my radius gage and focused on sanding down the High E side of the nut bottom, and keeping the radius.
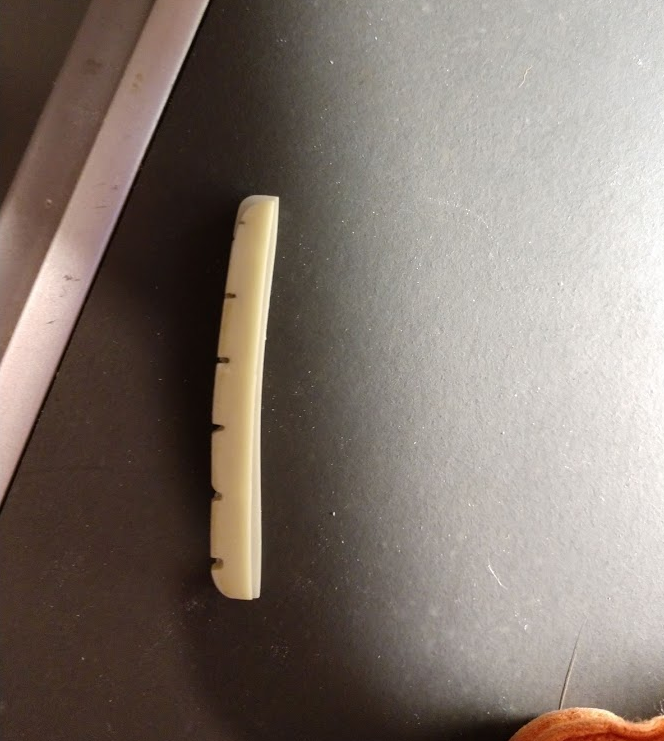
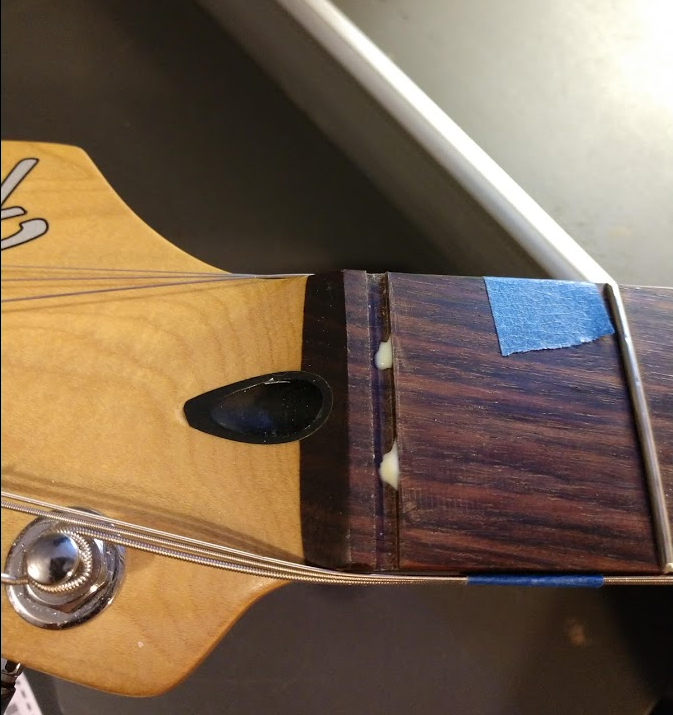
6. Marking the new nut for the correct width.
7. Final fitting.....
8. Just a couple small spots of glue to hold it in, plus...it fits pretty snug.....I don't think it's going to fall out.
7. Final fitting.....
8. Just a couple small spots of glue to hold it in, plus...it fits pretty snug.....I don't think it's going to fall out.
