This is a quick post describing how to migrate Koha to a new version via a complete new OS installation, and database migration.
It takes a little planning and a little knowledge, but it's a completely doable task if you just follow directions, and understand what's going on.
This document covers my migration from Debian 8 and Koha 17.11 to Debian 10 and Koha 20.05
In my case, I have a Koha 17.11 install on Debian 8 called "pine".
(I found this out by running the following command on the Debian 8 server)
$ sudo koha-list
The outline:
1) Install new OS (Debian 10 in my case)
2) Install koha-common (I used the 20.05 stable)
3) Install mariadb server
4) Setup apache and appropriate config files
5) Setup DNS -- make sure it's working correctly
6) Make sure web installer comes up
7) Create a blank database named the exact same as your "old" koha instance
8) Get a password for that blank database
9) Run the web installer and do a basic setup
10) switch to "old" koha server and do a database dump
11) copy the database dump to the "new" koha instance
12) restore the database
13) Upgrade Database Schema and rebuild.
--- that should do it....13 easy steps.
Tools needed : Putty and WinSCP (these two things just make it so much easier)
I'm not going to cover the complete screen by screen installation of Debian 10... there are plenty of sites dedicated to that.
https://phoenixnap.com/kb/how-to-install-debian-10-buster --- like here ( a quick Google search will probably produce several more...)
I will just try and hit the screens where there *might* be changes
My install is just a plain-jane install of Debian 10 on ESXi --- 40 Gig HDD and 4 Gig of RAM. Nothing special.
--basic Debian iso install (deb 10)
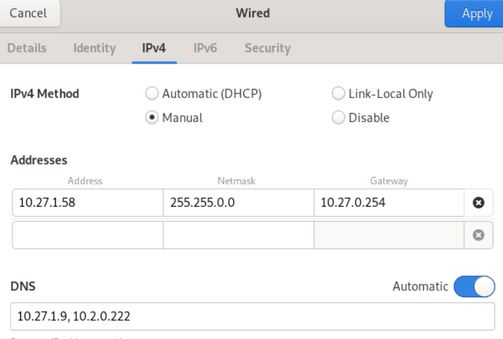
-- static IP and set server name / Domain name
-- install SSH
-- setup root access for GUI and SSH (this is not necessary. I just do it out of habit, it allows me to attach as root using Putty and WinSCP)
https://phoenixnap.com/kb/how-to-install-debian-10-buster --- like here ( a quick Google search will probably produce several more...)
I will just try and hit the screens where there *might* be changes
My install is just a plain-jane install of Debian 10 on ESXi --- 40 Gig HDD and 4 Gig of RAM. Nothing special.
--basic Debian iso install (deb 10)
-- static IP and set server name / Domain name
-- install SSH
-- setup root access for GUI and SSH (this is not necessary. I just do it out of habit, it allows me to attach as root using Putty and WinSCP)
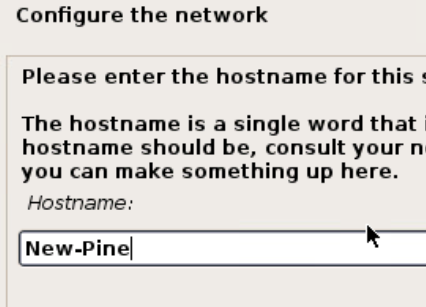
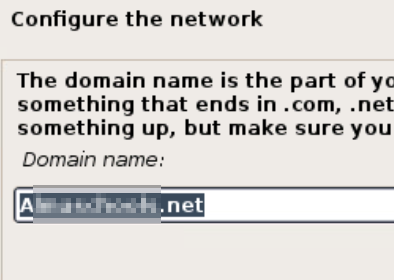
Because I’m using a local (on my network) DNS server the the host name really isn’t important…I just make it something that helps me identify the server.
In my case I made it "koha.pine.myDomain.net" (on the DNS server that is....).
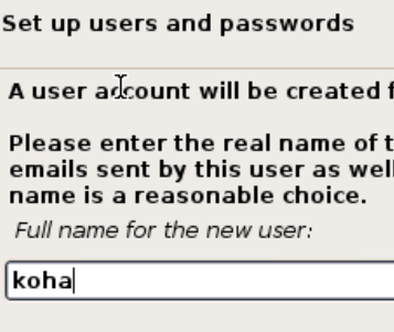
After that…set a root password, and then create a new user named “koha”
In my case I made it "koha.pine.myDomain.net" (on the DNS server that is....).
After that…set a root password, and then create a new user named “koha”
The basic Koha install on Debian is covered pretty well on the wiki
https://wiki.koha-community.org/wiki/Koha_on_Debian
**note: At this point I usually connect to the Debian server as "root" using Putty....it makes everything easier**
** I know detractors will slam me on the issues of allowing root access...but**
** After the server is set up and running, you can always go back and disable root access...if you turned it on...you can turn it off**
** so I don't need to use the sudo command...but I left them here in case any non root users want to cut / paste commands**
the highlights are here (pretty much directly copied from the wiki):
$ wget -q -O- https://debian.koha-community.org/koha/gpg.asc | sudo apt-key add -
$ sudo apt-get update
If you chose stable:
$ echo 'deb http://debian.koha-community.org/koha stable main' | sudo tee /etc/apt/sources.list.d/koha.list
$ sudo apt-get update
19.11 follows three releases behind the current stable release
20.05 follows two releases behind the current stable release
20.11 follows one release behind the current stable release
21.05 is the current stable release
dev (master) follows the current development, this is intended for developers and testers only
If you chose 20.05:
$ echo 'deb http://debian.koha-community.org/koha 20.05 main' | sudo tee /etc/apt/sources.list.d/koha.list
$ sudo apt-get update
$ apt-get install koha-common
$ sudo apt-get install mariadb-server
** note: whenever I need to edit files, I use WinSCP to connect to the server as "root" and edit them using WinSCP ...it makes it much easier**
** I know detractors will slam me on the issues of allowing root access...but**
** After the server is set up and running, you can always go back and disable root access...if you turned it on...you can turn it off**
Edit the file /etc/koha/koha-sites.conf and adjust it to suit the configuration that you'd like.
******************
DOMAIN=".myDomain.net"
INTRAPORT="8080"
INTRAPREFIX=""
***************
I'm old school and like the OPAC on port 80 (standard web port) and my admin interface on port 8080
Set up Apache
$ sudo a2enmod rewrite
$ sudo a2enmod cgi
$ sudo service apache2 restart
Remember to edit /etc/apache2/ports.conf and make sure the following lines are present:
Listen 80
Listen 8080
If you can't get connected to 8080 --- this is probably why.
another spot to check is the
/etc/apache2/sites-enabled/site.conf
ServerName koha.pine.myDomain.net <<< for ease...this should match your DNS entry...
SetEnv KOHA_CONF "/etc/koha/sites/pine/koha-conf.xml"
AssignUserID pine-koha pine-koha
Where "pine" is the name of my old library instance
$ sudo koha-create --create-db pine
$ sudo koha-passwd pine
So in may case
koha.pine.myDomain.net << will be my OPAC user interface
koha.pine.myDomain.net:8080 << will be my admin / librarian interface
Go to the web installer (port:8080) and run through the install.
You *should* be able to just pretty much press 'continue" and go with the defaults.
---- A this point, you should have a fresh Koha install on the new Debian 10 server, and a brand new database called "pine". The database is "there" but it is empty.
---- if you browse to the koha.pine.myDomain.net site, you should have a "Welcome to Koha" page, but no data to search
---- if you browse to the koha.pine.myDomain.net:8080 site, you should see the admin pages, but they should be pretty empty
Switch back to the "old" Koha server, and do a database dump:
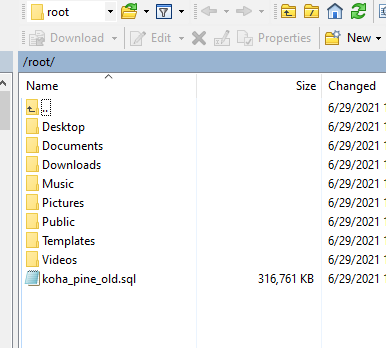
$ mysqldump -u root -p koha_pine > koha_pine_old.sql
this will create a file named "koha_pine_old.sql".
Copy this file to your desktop (WinSCP) , and disconnect from the "old" Koha server.
Connect to the "new" Koha server, and copy the file up to it.
(again...WinSCP is great for doing stuff like this)
https://wiki.koha-community.org/wiki/Koha_on_Debian
**note: At this point I usually connect to the Debian server as "root" using Putty....it makes everything easier**
** I know detractors will slam me on the issues of allowing root access...but**
** After the server is set up and running, you can always go back and disable root access...if you turned it on...you can turn it off**
** so I don't need to use the sudo command...but I left them here in case any non root users want to cut / paste commands**
the highlights are here (pretty much directly copied from the wiki):
$ wget -q -O- https://debian.koha-community.org/koha/gpg.asc | sudo apt-key add -
$ sudo apt-get update
If you chose stable:
$ echo 'deb http://debian.koha-community.org/koha stable main' | sudo tee /etc/apt/sources.list.d/koha.list
$ sudo apt-get update
19.11 follows three releases behind the current stable release
20.05 follows two releases behind the current stable release
20.11 follows one release behind the current stable release
21.05 is the current stable release
dev (master) follows the current development, this is intended for developers and testers only
If you chose 20.05:
$ echo 'deb http://debian.koha-community.org/koha 20.05 main' | sudo tee /etc/apt/sources.list.d/koha.list
$ sudo apt-get update
$ apt-get install koha-common
$ sudo apt-get install mariadb-server
** note: whenever I need to edit files, I use WinSCP to connect to the server as "root" and edit them using WinSCP ...it makes it much easier**
** I know detractors will slam me on the issues of allowing root access...but**
** After the server is set up and running, you can always go back and disable root access...if you turned it on...you can turn it off**
Edit the file /etc/koha/koha-sites.conf and adjust it to suit the configuration that you'd like.
******************
DOMAIN=".myDomain.net"
INTRAPORT="8080"
INTRAPREFIX=""
***************
I'm old school and like the OPAC on port 80 (standard web port) and my admin interface on port 8080
Set up Apache
$ sudo a2enmod rewrite
$ sudo a2enmod cgi
$ sudo service apache2 restart
Remember to edit /etc/apache2/ports.conf and make sure the following lines are present:
Listen 80
Listen 8080
If you can't get connected to 8080 --- this is probably why.
another spot to check is the
/etc/apache2/sites-enabled/site.conf
ServerName koha.pine.myDomain.net <<< for ease...this should match your DNS entry...
SetEnv KOHA_CONF "/etc/koha/sites/pine/koha-conf.xml"
AssignUserID pine-koha pine-koha
Where "pine" is the name of my old library instance
$ sudo koha-create --create-db pine
$ sudo koha-passwd pine
So in may case
koha.pine.myDomain.net << will be my OPAC user interface
koha.pine.myDomain.net:8080 << will be my admin / librarian interface
Go to the web installer (port:8080) and run through the install.
You *should* be able to just pretty much press 'continue" and go with the defaults.
---- A this point, you should have a fresh Koha install on the new Debian 10 server, and a brand new database called "pine". The database is "there" but it is empty.
---- if you browse to the koha.pine.myDomain.net site, you should have a "Welcome to Koha" page, but no data to search
---- if you browse to the koha.pine.myDomain.net:8080 site, you should see the admin pages, but they should be pretty empty
Switch back to the "old" Koha server, and do a database dump:
$ mysqldump -u root -p koha_pine > koha_pine_old.sql
this will create a file named "koha_pine_old.sql".
Copy this file to your desktop (WinSCP) , and disconnect from the "old" Koha server.
Connect to the "new" Koha server, and copy the file up to it.
(again...WinSCP is great for doing stuff like this)
Once the file is copied to the new server:
Remove the existing database in the new Koha installation
$ sudo mysql -uroot -p <<< After you enter the password, this will take you into a SQL shell where we'll drop the database and create a new/clean one.
>drop database koha_pine;
>create database koha_pine;
>quit;
and then restore the backup file you copied up to the server
$ sudo mysql -uroot -p koha_pine < koha_pine_old.sql
if everything went well....it should complete with no errors.
Next we need to clean up the database a little....and make sue the old database schema get updated
$ sudo service memcached restart
$ sudo koha-upgrade-schema pine
..and lastly, rebuild the Zebra Index.
$ sudo koha-rebuild-zebra -v -f pine
At this point I usually give the entire server (the Debian box) a bounce (reboot)
After it comes back up.... everything should be good to go.
